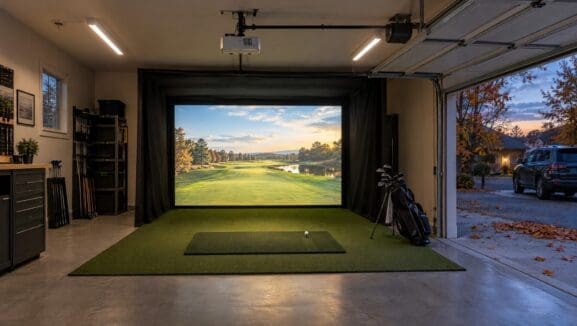

How Much Does a Golf Simulator Cost? The Complete 2026 Buyer’s Guide
Quick Answer: Golf simulator systems range from budget-friendly DIY setups at around $1,500 to professional TrackMan installations exceeding $40,000. Key costs include launch monitors, enclosures, projectors, mats, software subscriptions, and installation labor. For tailored quotes and verified listings, browse GolfSimSpot.com to compare options and find the perfect setup for your needs.
Table of Contents
- Cost Components Overview
- Budget Simulators (<$2,000)
- $2,000–$10,000 Options
- $10,000+ Professional Systems
- Enclosure & Impact Screen Costs
- Projector Pricing & Quality
- Hitting Mats & Strips
- Software & Subscription Fees
- DIY vs Professional Installation
- Must-Haves vs Nice-to-Haves
- Frequently Asked Questions
- Citations & Sources
Cost Components Overview
Building a golf simulator involves several line items, and understanding each category helps you budget realistically while prioritizing features that matter most. The single largest expense is typically the launch monitor—the device that tracks your ball flight and club data. These range from $500 for entry-level radar units all the way up to $30,000 for professional optical systems like TrackMan or Full Swing KIT that deliver tour-level accuracy.
Once you’ve selected your launch monitor, you’ll need an enclosure and impact screen to contain errant shots and provide a projection surface. Expect to spend anywhere from $800 for a basic DIY setup to $3,000 for commercial-grade enclosures with reinforced netting and professional mounting hardware. Your projector choice affects both image quality and ambient light performance, with options spanning $400 budget models to $3,000+ laser 4K units. Don’t forget the hitting mat ($150–$600), which protects your floor and provides realistic turf feedback, plus software subscriptions that unlock course libraries and practice modes ($99–$1,100 annually).
Finally, there’s the decision between DIY assembly and professional installation. Doing it yourself saves $500–$5,000 in labor costs but demands time, patience, and some technical skill. Professional installers handle everything from projector alignment to launch monitor calibration, ensuring optimal performance from day one. Throughout this guide, we’ll explore each cost category in depth, compare popular brand options, and share insider tips on where to save versus where to invest for the best long-term value.
Budget Simulators (<$2,000)
Entry-Level Launch Monitors That Deliver Value
If you’re working with a tight budget, the good news is that entry-level technology has improved dramatically in recent years. Devices like the Rapsodo MLM ($499) and Garmin Approach R10 ($599) offer surprisingly capable tracking for basic shot metrics including carry distance, ball speed, club speed, and estimated spin rates. They connect wirelessly to your smartphone or tablet, eliminating the need for expensive computers or complicated wiring setups.
These budget-friendly monitors work best indoors with simple netting arrangements or outdoors in your backyard. While you won’t get the precise launch angle measurements or advanced spin axis data that professionals rely on, they provide more than enough feedback for recreational players focused on building consistent ball-striking patterns. One Reddit user shared: “My Garmin R10 setup cost $1,200 total with a net and mat—I practice year-round now and my handicap dropped 4 strokes.” That kind of value proposition is tough to beat for casual improvement.
Retailers like Golf Sim Depot offer starter bundles that pair these launch monitors with basic hitting mats and portable nets for around $1,500 complete. These packages handle the guesswork of component compatibility and often include basic software licenses to get you started. Just understand the limitations: budget monitors struggle with wedge shots under 50 yards, putting isn’t tracked, and data accuracy can vary in bright sunlight or with certain ball types.
DIY Enclosures Keep Costs Down
Pre-fabricated golf enclosures can easily consume $2,000–$3,000 of your budget, but creative DIYers regularly build functional alternatives for $300–$800. The basic formula involves constructing a frame from PVC piping or mild steel tubing, then draping heavy-duty canvas tarps or specialized impact netting over the structure. One popular Reddit build documented an 8’x10′ enclosure using 1.5″ steel EMT conduit ($150), grommeted canvas drop cloths ($200), and heavy-duty bungee cords ($50) for a total of around $400.
For the impact screen itself—the surface where your ball makes contact and projector image displays—budget options start at $100 for basic woven polyester. Rapsodo’s DIY enclosure kit includes a reinforced impact screen for $299, striking a balance between affordability and durability. Just make sure whatever material you choose is rated for golf ball impacts; regular projection screens or bedsheets will tear quickly under driver shots.
The DIY approach demands some handyman skills and willingness to problem-solve, but online communities offer tremendous support. YouTube channels and forum threads document every step of the process, sharing lessons learned about frame stability, screen tension, and optimal hitting distances. If you enjoy building projects and want to maximize your simulator budget toward better technology rather than enclosure aesthetics, DIY is absolutely the way to go.
$2,000–$10,000 Options
The Sweet Spot for Serious Golfers
The mid-range segment represents where most dedicated golfers land when building home simulators. Launch monitors in this category—primarily SkyTrak+ ($2,000–$2,500) and FlightScope Mevo+ ($1,900–$2,200)—deliver impressive accuracy that rivals systems costing twice as much. SkyTrak+ uses photometric technology to capture ball flight with exceptional precision, tracking parameters like spin rate, launch angle, and side spin that budget units simply can’t measure reliably.
FlightScope Mevo+ takes a different approach with Doppler radar, offering both indoor and outdoor versatility. It tracks not just ball metrics but also club head speed, club path, and face-to-path relationships—data that’s invaluable for diagnosing swing faults and monitoring improvement. The wireless connectivity and robust mobile apps mean you can practice anywhere with reliable shot tracking, from your garage to the driving range to vacation rentals.
Planning to put the whole setup in a backyard building instead? Our golf simulator shed guide walks through real builds at three budgets, from carport conversions to turnkey studios.
When you bundle these monitors with quality enclosures, projectors, and mats, complete systems from retailers like Big Horn Golfer run $5,000–$8,000. These packages typically include commercial-grade impact screens, short-throw projectors optimized for golf simulation, premium hitting mats that protect joints and floors, and software licenses that unlock dozens of championship courses. You’re getting “nearly professional” capabilities at less than half the cost of true tour-level systems—making this tier incredibly popular among teaching professionals, serious amateurs, and households where multiple family members will use the simulator regularly.
Projectors That Match Your Ambitions
In the mid-range budget category, your projector choice significantly impacts the overall experience. Standard throw projectors ($500–$800) work fine if you have deep rooms (15+ feet from screen to hitting area) and can control ambient lighting. Models like the Optoma GT1080HDR ($699) or ViewSonic PX701-4K ($799) deliver solid 1080p or budget 4K images that look great in dimly lit spaces.
But if you want the best possible image quality without worrying about lighting conditions, short-throw laser projectors are worth the investment. Units like the BenQ TH671ST ($1,499) or Epson Home Cinema 3800 ($1,199) project clear, bright images from just 4–6 feet away, eliminating shadows and hot spots while making installation dramatically easier. They handle ambient light better, start up instantly, and maintain brightness consistency over 20,000+ hours of use—far exceeding traditional lamp-based projectors that dim significantly after 3,000–5,000 hours.
For golfers practicing during daytime hours or in rooms with windows, the improved image quality of short-throw lasers justifies their higher price tag. You’ll actually see subtle breaks in putting practice, track ball flight more naturally, and enjoy course graphics that feel immersive rather than washed out. That enhanced experience keeps you engaged during practice sessions, which ultimately means more improvement and better return on your simulator investment.
Quality Hitting Mats Make a Difference
Don’t underestimate the importance of a premium hitting mat in this price range. Budget options ($150–$250) use thin turf and minimal padding, which can lead to joint stress and unrealistic feedback. Mid-tier mats like the Carl’s Place ProTee Elite ($499) or Country Club Elite Real Feel ($595) feature dense foam layers that absorb impact while providing fairway-like turf response.
These quality mats protect both your body and your clubs. Repeated impacts on hard surfaces can cause elbow and wrist strain over time, while cheap mats with exposed rubber can damage club faces and soles. Good mats also reduce the hollow “thud” sound that drives family members crazy, making your practice sessions more pleasant for everyone in the house. Look for mats with replaceable turf sections—after a few hundred driver swings, even premium turf shows wear, and being able to swap out hitting strips extends the mat’s usable life considerably.
$10,000+ Professional Systems
Tour-Level Technology for Serious Investment
At the premium end of the market, you’re looking at the same technology used by PGA Tour players and elite teaching facilities. TrackMan iO systems start around $20,000 for the launch monitor alone, with complete “SwingBay” packages including custom enclosures, professional installation, and furniture running $30,000–$45,000. Full Swing KIT systems occupy similar price territory, offering multi-camera arrays that capture every aspect of ball flight and club movement with sub-degree precision.
What separates these systems from mid-tier options isn’t just accuracy—though the measurements are indeed more precise—it’s the depth of data and reliability under all conditions. TrackMan tracks over 40 data points per shot, including metrics like dynamic loft, spin axis, curvature, and smash factor with consistency that stands up to professional scrutiny. Full Swing’s multi-camera technology works flawlessly with all club types, from 60-degree wedges to drivers, and handles both right and left-handed players without recalibration.
These systems are genuinely turnkey solutions. Companies like Rain or Shine Golf handle everything from initial space assessment and design consultation through construction, installation, calibration, and staff training. They’ll integrate your simulator with existing home automation systems, design custom millwork and finishes, and provide ongoing maintenance packages. For country clubs, teaching academies, or high-end private installations, this level of service eliminates the hassle entirely—you just walk into a completed, professionally calibrated golf studio ready for immediate use.
Understanding Premium Software Subscriptions
High-end systems come with substantial ongoing costs in the form of software subscriptions. TrackMan’s annual software license runs approximately $1,100, providing access to their complete course library (90+ championship layouts), advanced practice modes, and detailed analytics platforms used by tour professionals. Full Swing’s subscription sits around $1,500/year and includes regular content updates, multi-user account management, and integration with their online tournament system.
For commercial facilities charging $60–$80 per hour for simulator access, these subscription costs represent small percentages of monthly revenue. But private owners should carefully consider whether the advanced features justify ongoing expenses. Many premium systems allow downgraded subscriptions that maintain basic functionality while reducing costs—something worth discussing with vendors before committing to a purchase.
That said, the software truly is exceptional. TrackMan’s practice modes include targeted challenges for every aspect of your game, from approach shot precision to lag putting consistency. Their performance analytics track improvement over time with professional-grade metrics, making it easy to identify weaknesses and measure progress. For dedicated players serious about game improvement, these tools accelerate development in ways that aren’t possible with mid-tier software packages.
When Premium Systems Make Sense
Despite the significant investment, premium systems deliver value in specific situations. Teaching professionals who rely on precise club and ball data for student instruction find that TrackMan or Full Swing systems pay for themselves through enhanced lesson quality and reputation. Country clubs installing simulators for member use position these amenities as key membership benefits, with the superior experience justifying premium dues.
High-net-worth individuals who golf regularly often view premium simulators as lifestyle investments comparable to home theaters or wine cellars—the cost is substantial but the daily enjoyment and convenience outweigh financial considerations. And for serious competitive amateurs working toward elite tournament play, having access to professional-grade data at home provides training advantages that can genuinely impact performance.
Enclosure & Impact Screen Costs
Commercial Enclosures vs DIY Solutions
Pre-manufactured golf simulator enclosures provide turnkey convenience and professional aesthetics, but they command premium prices. Complete enclosure packages from companies like The Indoor Golf Shop or Carl’s Place typically run $1,500–$3,000, including impact-rated screens, full netting systems, ceiling mounts, and all necessary hardware.
These commercial systems offer real advantages: impact screens are specifically engineered to absorb golf ball energy while maintaining projection surface quality; netting uses tear-resistant materials rated for repeated driver impacts; and mounting systems allow proper screen tension that prevents sagging or premature wear. Professional enclosures also look polished—important if your simulator occupies living space or you plan to entertain guests. Many commercial venues prefer pre-manufactured enclosures because they meet insurance requirements and local building codes without modification.
DIY builders willing to invest time and creativity can achieve similar functionality for $500–$1,200. One well-documented Reddit build used 1.5″ steel EMT conduit ($200), heavy-duty canvas drop cloths with grommets ($250), industrial bungee cords ($30), and a reinforced impact screen ($400) for a total of $880. The frame provided structural rigidity while the canvas sides contained errant shots, and the builder noted the system had withstood over 10,000 shots without significant wear.
The DIY path demands careful planning around dimensions, material selection, and construction techniques. You’ll need to calculate proper screen distance for your projector throw ratio, ensure frame stability to prevent wobbling during use, and implement adequate screen tensioning to avoid wrinkles that distort projected images. But for handy individuals who enjoy building projects, the cost savings are substantial—allowing you to allocate more budget toward better launch monitors or projectors.
Impact Screen Quality Matters
Your impact screen choice directly affects both system longevity and image quality. Basic woven polyester screens available for $100–$200 might seem attractive from a budget perspective, but they typically show significant wear after just a few months of regular use. Driver impacts create small tears that expand over time, and the material’s texture can create visible patterns that interfere with projected images.
Mid-tier screens like those from Rapsodo ($299) or Rain or Shine Golf ($549) use multi-layer vinyl construction with reinforced stitching at stress points. These screens absorb ball impacts effectively while maintaining smooth surfaces that don’t interfere with projector output. They’re rated for 50,000+ impacts and typically come with warranties covering manufacturing defects.
Premium ballistic nylon screens ($800–$1,200) represent overkill for most home installations but make sense for commercial facilities expecting heavy use. These screens incorporate materials originally developed for military applications, offering near-indestructible durability while maintaining excellent projection characteristics. Some include acoustic dampening properties that reduce the impact noise—a feature particularly valuable in shared living spaces or facilities with noise-sensitive neighbors.
Projector Pricing & Quality Considerations
Throw Distance and Image Quality
Standard throw projectors work when you have adequate room depth—typically 12–15 feet between projector and screen. Budget models like the ViewSonic PA503W ($429) or Optoma S334e ($499) deliver acceptable 1080p images in controlled lighting conditions. They’re mounted either on ceilings behind the hitting area or on shelves at appropriate distances, projecting over the golfer’s head onto the impact screen.
However, standard throw projectors create challenges in typical home spaces. Shadows appear when players stand too close to the screen, and ambient light from windows or overhead fixtures significantly degrades image quality. You’ll also notice “hot spots”—bright regions at projection center that fade toward edges—which can be distracting during play. For many golfers, these limitations frustrate the simulator experience enough to justify spending more on better projection solutions.
Short-throw projectors like the BenQ TH671ST ($1,499) or Epson Home Cinema 3800 ($1,199) project large images from just 4–6 feet away, typically mounted on ceilings directly above hitting mats. This positioning eliminates player shadows, reduces hot spots, and makes installation much simpler since you don’t need to run cables across long distances or worry about precise alignment. The images remain bright and clear even with moderate ambient light, allowing daytime practice without closing curtains or dimming overhead lights.
Laser Projectors Deliver Premium Experience
For the ultimate visual experience, laser projectors like the BenQ LK936ST ($3,200) or Optoma ZU660 ($3,500) represent the current pinnacle of home golf simulation technology. These units combine short-throw convenience with true 4K resolution and laser light sources that maintain consistent brightness over 20,000+ hours without maintenance. They power on instantly—no warm-up periods—and deliver vibrant colors that make virtual courses look stunning.
Laser technology particularly shines in partially lit rooms or spaces with windows. The extreme brightness (3,500+ lumens) overcomes ambient light that would wash out lamp-based projectors, letting you practice during daytime without creating cave-like darkness. The improved image quality keeps you engaged during long practice sessions and creates more immersive experiences when playing rounds with friends or family.
For commercial installations or high-end home setups where simulators see daily use, laser projectors often prove cost-effective despite higher upfront prices. Traditional lamp-based projectors require bulb replacements every 3,000–5,000 hours at $200–$400 per bulb, while laser units run maintenance-free for their entire operational lives. A commercial facility operating simulators 8 hours daily would replace traditional projector bulbs 3-4 times annually—laser units eliminate this ongoing expense and associated downtime entirely.
Connectivity and Installation Accessories
Beyond the projector itself, budget for mounting hardware, cables, and connectivity solutions. Ceiling mounts typically cost $50–$150 depending on weight capacity and adjustment features. Quality HDMI cables rated for your installation distance run $20–$50, though longer runs may require powered HDMI extenders ($80–$150) to maintain signal quality.
Wireless HDMI transmitters offer cleaner installations by eliminating cables between your computer/tablet and projector. Systems like the Nyrius Aries Pro ($349) or J-Tech Digital HDbitT ($279) transmit 1080p signals reliably up to 150 feet, making them popular choices for simulator installations where running cables would be difficult or unsightly. Just verify your wireless system supports the resolution and refresh rate your launch monitor requires—some budget wireless solutions can’t handle 4K at 60Hz or introduce latency that affects gameplay.
Hitting Mats & Strips
Understanding Mat Construction and Feel
Golf mats vary enormously in quality, and those differences directly impact your practice experience and physical comfort. Budget mats ($150–$250) typically feature thin turf (under 1.5″) mounted to hard rubber backing. They provide basic ball-launching platforms but offer little shock absorption—your joints absorb impact forces that would normally dissipate into real turf and soil. After extended sessions on cheap mats, many golfers report elbow soreness, wrist discomfort, or lower back fatigue.
Mid-tier mats like the Carl’s Place ProTee Elite ($499) incorporate 3″ foam underlayment beneath quality synthetic turf. This cushioning dramatically reduces impact shock while maintaining realistic turf interaction—you get proper feedback without the joint stress. The turf fibers themselves are engineered to simulate fairway conditions, allowing proper club-ground interaction during iron shots while releasing cleanly for driver swings.
Premium mats ($600+) like the Fiberbuilt Flight Deck ($699) or Country Club Elite Real Feel ($795) represent the current state of the art. They use advanced fiber systems that genuinely replicate the feel of hitting off grass, include replaceable hitting surfaces for extended life, and offer adjustable firmness to simulate different course conditions. Some high-end mats even incorporate different turf sections—tight lies, light rough, and heavy rough—letting you practice from various conditions without leaving your simulator room.
Hitting Strips and Tee Areas
The hitting strip—the small section where you actually stand and tee your ball—sees the most concentrated wear and deserves special attention. Many simulator builders use separate hitting strips that can be replaced independently from the main mat, extending overall system life and reducing long-term costs. Products like the Carl’s Place Diamond Hitting Strip ($149) or FiberBuilt Replacement Strips ($89) offer this modularity.
Proper hitting strip placement matters for realistic practice. Your ball should sit at turf height that matches your mat’s surface—raised tees that position balls 2-3″ above the mat create artificially easy conditions that don’t transfer to real course play. Many premium mats include integrated tee systems with rubber tees at various heights, eliminating fumbling with wooden tees while providing consistent ball positioning.
For golfers who care about truly realistic practice, investing in quality mat systems pays dividends through better swing development. Poor mats teach compensations—like hitting slightly behind the ball to avoid harsh impacts—that hurt your game outdoors. Quality mats let you practice proper technique without consequences, so the skills transfer directly to on-course performance.
Software & Subscription Fees
Understanding Subscription Tiers
Golf simulator software operates on subscription models that can significantly impact your long-term costs. SkyTrak offers three tiers: Basic ($99/year) includes core practice modes and limited course access; Play & Improve ($149/year) adds skills challenges and expanded courses; and Game Improvement ($499/year) unlocks their complete course library, online tournaments, and advanced analytics. For casual practice focused on distance control and basic feedback, the Basic plan suffices—serious players benefit from higher tiers.
TrackMan’s software subscription runs approximately $1,100 annually, providing access to 90+ championship courses, detailed practice modes, and their complete analytics platform. This subscription is essentially mandatory for TrackMan users—without it, the system provides only basic shot data without the practice environments and course play that make simulators engaging. For teaching professionals or dedicated players, the expense justifies itself through the depth of available features and quality of content.
E6 Connect takes a middle path with subscription pricing around $349/year for their standard package, offering 14 courses and core practice features. Their premium tier ($599/year) expands to 87 courses and includes online play. Many mid-tier launch monitors from Bushnell, Garmin, and Rapsodo integrate with E6 Connect, making it a popular choice for golfers who want quality software without the premium prices of proprietary TrackMan or Full Swing systems.
One-Time Purchase vs Subscription Models
Some systems avoid subscriptions entirely through one-time software purchases. The Golf Club 2019 (TGC 2019) runs about $100 as a one-time Steam purchase and integrates with launch monitors through third-party software. You get basic course simulation and practice modes without ongoing fees—appealing if you primarily care about shot tracking rather than photorealistic graphics or extensive course libraries.
Open-source and community-developed options also exist, though they require more technical knowledge to configure. Projects like OpenGolf or GSPro (subscription-based but community-driven at $250/year) offer alternatives to mainstream options, often with better support for custom courses and community-created content. These platforms appeal to tech-savvy golfers who enjoy tinkering and want maximum flexibility in their simulator setup.
When evaluating software options, consider your actual usage patterns. If you play rounds regularly with friends and care about graphics quality and course variety, premium subscriptions deliver value through content and features. But if your priority is practicing specific shots and tracking improvement metrics, basic tiers or one-time purchase options save hundreds annually without sacrificing core functionality.
Those subscriptions cover the game on the screen. The software that takes reservations and charges customers is a separate purchase, and we compared the published prices of nine golf simulator booking platforms.
DIY vs Professional Installation
The Case for DIY Installation
Tackling simulator installation yourself can save $500–$5,000 in labor costs—money that can upgrade your launch monitor, projector, or other components. For handy individuals comfortable with basic construction, the process involves mounting your projector to ceiling joists, hanging your impact screen at proper height and tension, positioning your launch monitor at the manufacturer’s specified location, and running cables between components.
Online resources make DIY installation dramatically easier than it once was. YouTube channels dedicated to golf simulators document complete builds from start to finish, showing common mistakes to avoid and sharing optimization tips. Forums like r/Golfsimulator on Reddit host thousands of members eager to answer questions and troubleshoot problems. Manufacturers typically provide detailed installation manuals with their products, and many offer phone or email support for DIY builders encountering issues.
That said, DIY installation demands realistic assessment of your skills and available time. Incorrect projector positioning can create geometric distortions that make gameplay uncomfortable. Poor screen tension causes wrinkles that interfere with image quality. Launch monitors require precise positioning and calibration—millimeters matter for accurate data collection. One forum member shared: “I spent three weekends getting my setup right, repositioning the projector four times before I got the geometry perfect. Would I do it again? Absolutely—but only because I enjoyed the process. If you just want to play golf, hire pros.”
Professional Installation Benefits
Companies specializing in golf simulator installation like The Indoor Golf Shop or Rain or Shine Golf bring expertise that eliminates guesswork and accelerates the process from weeks to days. They arrive with specialized tools for measuring projector throw distances, calculating optimal screen positioning, and calibrating launch monitors to your specific hitting surface and ceiling height.
Professional installation typically includes detailed site assessment, custom component recommendations based on your space constraints, complete assembly and mounting, system calibration and testing, and user training on operating all equipment. Many installers offer warranty coverage on their work—if alignment issues or calibration problems emerge within the first year, they return to correct them at no additional charge.
For commercial installations, professional service is essentially mandatory. Building codes, insurance requirements, and ADA accessibility standards all demand certified installations that meet specific criteria. Professional installers carry liability insurance protecting you from accidents during installation, and they ensure compliance with local electrical codes when adding circuits or modifying existing wiring. They also integrate simulators with existing building systems—HVAC, lighting controls, fire suppression—in ways that maintain proper functionality and pass inspection.
The cost calculus around professional installation depends on your situation. If your space is straightforward—standard ceiling height, adequate room dimensions, basic electrical—and you’re comfortable with tools, DIY makes financial sense. But if you’re dealing with unusual spaces, complex integration requirements, or simply want guaranteed optimal performance from day one, professional installation delivers value that justifies the expense.
Must-Haves vs Nice-to-Haves
Essential Components You Can’t Skip
At absolute minimum, a functional golf simulator requires five core elements: a launch monitor capable of tracking ball flight, an impact screen or net to catch shots safely, a hitting mat to protect your floor and clubs, a projector or display for visual feedback, and software that interprets launch monitor data into playable golf. Without any of these pieces, the system simply doesn’t work as intended.
Beyond the basic five, a few additional items quickly prove essential for sustained use. Proper lighting helps launch monitors track balls consistently—LED strip lights positioned at specific angles eliminate shadows that can cause misreads. A reliable network connection, whether wired Ethernet or strong WiFi, ensures smooth data transfer between components without frustrating dropouts mid-swing. Basic cable management keeps your space safe and organized—tripping over projector cables or power cords turns practice sessions into hazards.
One often-overlooked essential is adequate ventilation or climate control. Simulators generate heat from projectors and launch monitors, and human activity in enclosed spaces raises temperatures quickly. A small fan or portable AC unit ($150–$300) maintains comfortable conditions during extended practice sessions, preventing both equipment overheating and player discomfort.
Upgrades That Enhance the Experience
Once your core system functions reliably, several upgrades can significantly enhance your practice quality and enjoyment. Video cameras positioned to capture your swing from down-the-line or face-on angles ($200–$500) let you review technique and compare against professional models. Many modern golf teaching relies on video analysis, and having this capability in your home simulator accelerates improvement dramatically.
Automatic ball dispensers or return systems ($300–$800) eliminate the tedious task of picking up balls after each shot, maintaining practice momentum and allowing more swings per session. For serious practice where you’re hitting hundreds of balls, this convenience factor becomes genuinely valuable. Some high-end systems even pair with robotic ball feeders that position fresh balls on the tee automatically—premium luxury but undeniably convenient.
Sound systems specifically tuned for golf simulation ($400–$1,200) add immersion through realistic course ambiance and impact sounds. Quality speakers positioned around your simulator space recreate the experience of playing outdoors—birds chirping, wind rustling trees, the satisfying “click” of a pure iron strike. While not necessary for functionality, audio enhancement makes practice sessions more enjoyable and keeps you engaged for longer periods.
Luxury Features for Ultimate Setups
At the high end, golf simulators become complete entertainment spaces with custom millwork, bar installations, comfortable seating for spectators, multiple screens showing sports alongside your golf play, and integration with smart home systems controlling everything via voice commands or single-button scenes. These luxury features can easily add $10,000–$30,000 to simulator projects but create spaces where you genuinely want to spend time whether actively playing golf or hosting friends.
Premium flooring solutions like synthetic turf installed throughout the simulator space ($2,000–$5,000) make the environment feel more like actual golf rather than a basement or garage conversion. Custom lighting scenes that automatically adjust when starting rounds versus taking breaks enhance the experience without requiring manual switches. And high-end furniture—golf-themed pub tables, leather seating, vintage golf artwork—transform functional practice spaces into destination rooms within your home.
One more way to stretch the budget: buy secondhand. Our used golf simulator buying guide tracks real sold prices on 12 launch monitors, plus the subscription fine print that comes with each one.
Frequently Asked Questions About Golf Simulator Costs
General Cost Questions
What is the total cost to build a basic golf simulator?
A basic DIY setup with an entry-level launch monitor ($499–$699), simple impact screen ($100–$200), DIY enclosure ($300–$500), budget projector ($400–$600), hitting mat ($150–$250), and free or basic software runs approximately $1,500–$2,500 total. This provides functional practice capabilities without premium features.How much do mid-range golf simulators cost?
Complete mid-range systems with quality launch monitors like SkyTrak+ or FlightScope Mevo+ ($1,900–$2,500), commercial enclosures ($1,500–$2,000), short-throw projectors ($1,200–$1,800), premium mats ($400–$600), and annual software subscriptions ($150–$500) total $5,000–$8,000. These deliver near-professional accuracy and features.What do professional golf simulator systems cost?
Premium systems with TrackMan iO or Full Swing KIT technology run $20,000–$45,000+ including professional installation, custom enclosures, laser projectors, premium software subscriptions ($1,100–$1,500/year), and complete calibration. These are tour-level systems used by professionals and elite facilities.
Component-Specific Questions
How much should I spend on a golf simulator projector?
Budget 1080p projectors cost $400–$800 but struggle with ambient light. Short-throw models ($1,200–$2,000) offer better positioning and brightness. Laser 4K projectors ($3,000–$4,000) provide the ultimate image quality with minimal maintenance—worth the investment for serious installations.What hitting mat should I buy for my golf simulator?
Budget mats ($150–$250) work for occasional use but lack cushioning. Mid-tier mats like Carl’s Place ProTee Elite ($499) offer better shock absorption and durability. Premium mats ($600+) provide the most realistic feel and protect joints during extended practice.
Installation and Setup Questions
Should I install my golf simulator professionally or DIY?
DIY installation saves $500–$5,000 in labor but demands time and technical skill. Professional installation ensures proper calibration, optimal component positioning, and code compliance—particularly valuable for complex spaces or commercial installations. Consider your skills and available time honestly.How much do golf simulator software subscriptions cost?
Software ranges from free basic options to premium subscriptions. SkyTrak charges $99–$499/year depending on features. E6 Connect runs $349–$599/year. TrackMan’s premium subscription costs approximately $1,100/year. Choose based on desired course libraries and practice features.
Long-Term Costs
What are the ongoing costs of owning a golf simulator?
Annual expenses include software subscriptions ($99–$1,500/year), projector bulb replacements for lamp-based units ($200–$400 every 3,000–5,000 hours), hitting mat/screen replacement every 3-5 years ($300–$800), and occasional launch monitor calibration ($100–$300). Laser projectors eliminate bulb costs.
Wondering what computer runs all this? Our golf simulator computer requirements guide explains the specs for every platform above in plain English, with current prices.
Citations & Sources for Golf Simulator Costs
- GolfSimSpot.com – Golf Simulator Directory & Marketplace
- Golficity: Build Home Simulator Under $2,000
- Big Horn Golfer: $5K-$10K Simulator Collections
- Carl’s Place: Golf Simulator Components & Accessories
- The Indoor Golf Shop: Enclosures, Projectors & Installation
- SkyTrak Golf: Launch Monitors & Software
- TrackMan: Professional Golf Tracking Systems
- Full Swing Golf: Premium Simulator Technology
- Rain or Shine Golf: Complete Simulator Solutions
- FlightScope: Mevo+ Launch Monitors
- Rapsodo: Budget Launch Monitors & Enclosures
- BenQ: Golf Simulator Projectors
- E6 Connect: Golf Simulator Software